Ressurection of a Poly-61
Like some other 80´s polysynths with memory, many of today´s Poly-61s suffer from battery leakage. The problem for most owners without knowledge of the technicalities is that the symptoms come on slowly and do not neccessarily hint at memory. While leaking, the battery may still provide enough power to retain memory while starting to damage the PCB area around it. The device starts acting weird up to doing nothing at all soundwise. The symptoms depend a little on how the synth has been stored and therefore how the acid flowes across the board. If you see a Poly-61 on the used market described as ‘functional’ but ‘holding a steady tone’ it´s most likely a battery dammage.
I purchaised such a unit with the risk of not knowing the exact amount of dammage it had taken. But I was determined to make it fully operable again. After all I thought it couldn´t be worse than the Opera-6 fix.
Disclaimer
If you use the information presented here you are doing this at your own risk. I cannot be held responsible for any damage done to your device or yourself caused by your actions! You need the appropriate skills to do work on electrical devices.
The prequel
I looked around for information on the net but could not find much that was useful. Like others I remebered coming across a pretty extensive repair video, but it has been taken down by its author. The rest that is to be found are forum posts that describe the symptoms and take guesses and if they provide a solution it is only the general ‘re-crimp the connectors’ one. Some say that it helped, but never say why. And I wanted to know why …
There are plenty of download sources for the service manual, but the schematics contained are barely readable. It had to do though.
Symptoms
The device initially showed the following faults:
- Outputs a constant tone
- Most keys not working
- DCO2 not working on all voices
- Number 6 button not working
CPU board fix
First step was to open up the unit and examine the damage on the CPU board.
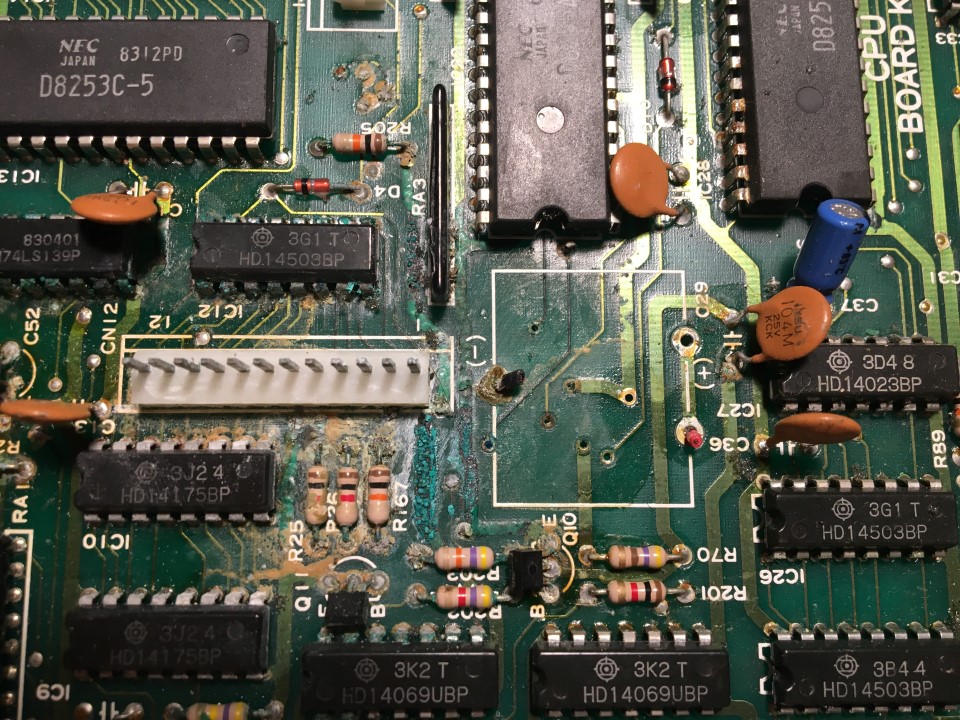
KLM-509A CPU board battery damage
Interestingly enough the board was missing the battery entirely. The two wire stumps seemed to be the remainders of a first repair attempt.
It would not have made sense to look for certain errors before the general dammage on the board wasn´t fixed. So first step was to remove all parts that where affected by the leak.
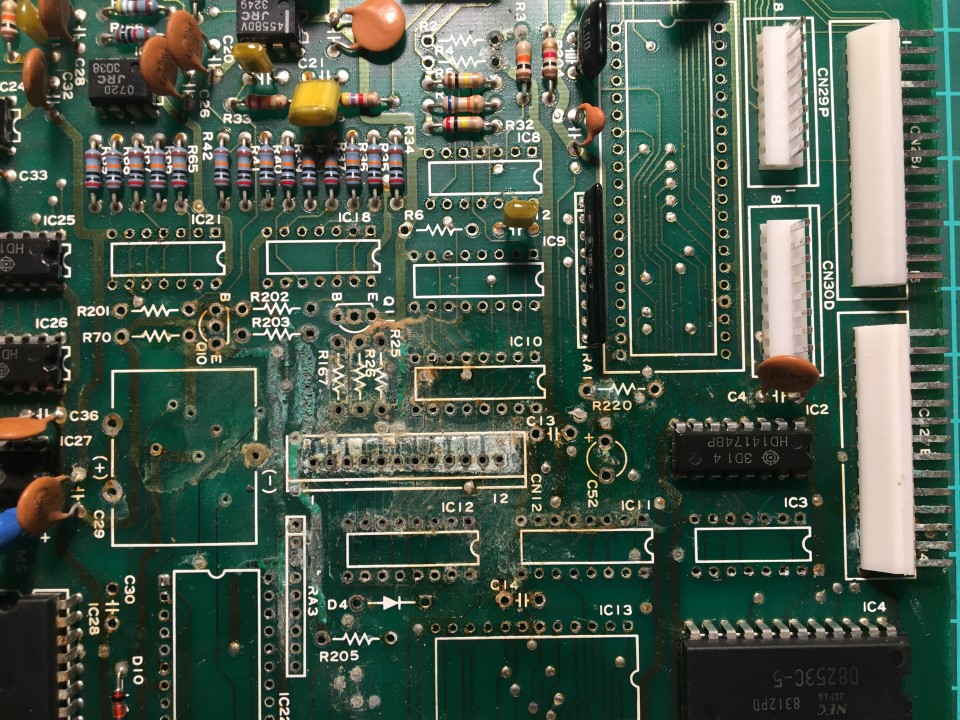
KLM-509A CPU board stripped
It should be noted that I also removed CN27B and IC2 after the picture was taken. Next was to clean the affected area. First I used 70% Isopropylic Alcohol and applied a big load of baking soda to neutralize the remaining acid.

KLM-509A CPU board sodarized
After removing the dried up soda with a tooth brush the damaged area looks alot better.

KLM-509A CPU board cleaned
From here we can look for broken traces. With a strong lightsource we can x-ray the board for a visual check. Notice the broken traces in the red marked area.
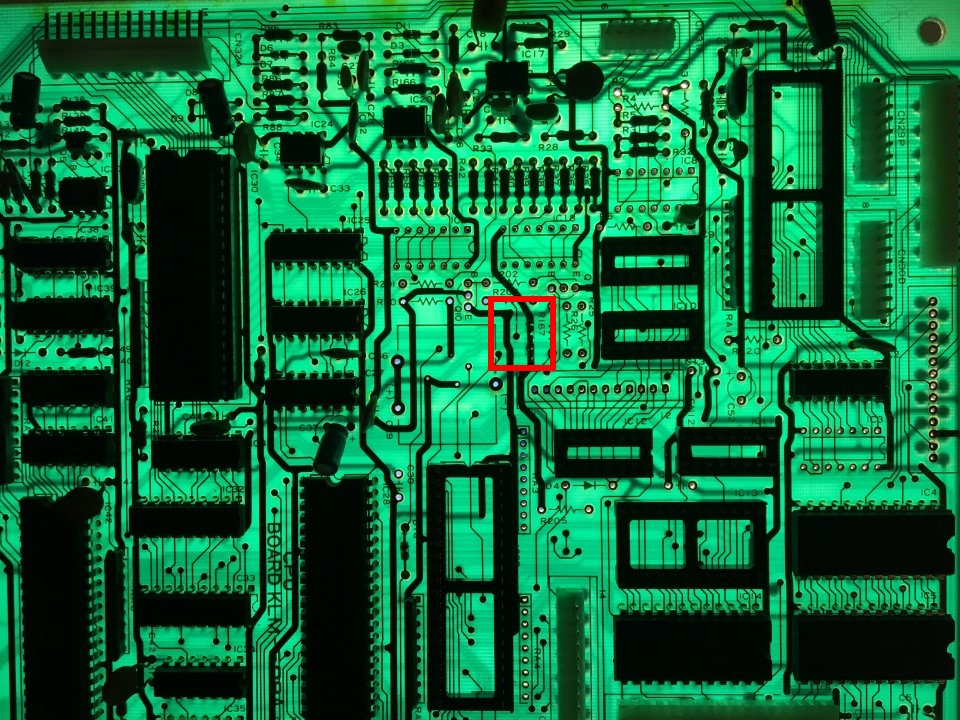
KLM-509A CPU board x-rayed
Visual examination is not enough though. It is best to verify all traces using a Digital Volt Meter in continuity mode. If at this point one has to be told to use insulated wire to fix the traces then one probably lacks the basic skills to take on this task at all …
As you can see on the picture already I used sockets instead of soldering the ICs into place directly. This helps in finding and correcting faults without putting stress on the chips.
Replacement parts
Sourcing replacement parts was not that hard. Basically all HD14xxx had to be replaced by MOS 40xxx equivalents. Only one transistor had to be sought out of a variety of possible replacements.
| Part | Original Type | Replacement Type | Comment |
|---|---|---|---|
| Q11 | (2S)C2785 | 2SC1815 | NPN, TO-92, 50V, 150mA |
| Q10 | (2S)A1175 | Still available at the shop of my choice | |
| IC | HD14xxx | MOS40xxx |
Battery replacement
I put in a lithium cell insead of the former reloadable type. This requires the load current resistor R70 to be replaced by a diode (1n4148 will do).
The general crimp fix
A heads up in advance: Yes, the board connectors can be the source of many problems on the Poly-61.
However it depends on the general damage, especially in the case of a leaked battery, whether it is enough to just re-crimp the connectors or whether more action is required. In my case the sockets of CN12 and CN27B where badly affected as well and needed to be cleaned to regain full connectivity. The crimps of the connectors where literally falling apart.
Fixing the faults
Constant tone
If a synth outputs sound constantly, chances are high that the VCA is open. Now in most cases the VCA is driven by an envelope generator. EGs need some sort of gate or trigger. The Poly-61 uses SSM2056 envelope generator ICs and they have a Gate input at pin 6. I checked the pins with a DVM and found ~1.3V at five of the six. Now 1.3V is given in the datasheet as the maximum required threshold voltage for the gate. So all these inputs where active. Looking at the schematics you will eventually find that the gate lines are directly connected to buffer IC outputs on KLM-509 via CN12. With CN12 being severely damaged by the battery acid and having barely any connectivity, the affected gate lines where floating. I assume that this causes the 2056 to pull the inputs high internally for some reason. I cleaned the pins of the board connector with a dremel brush and for the lack of replacement crimps came up with a temporary solution until I manage to source the right crimps.
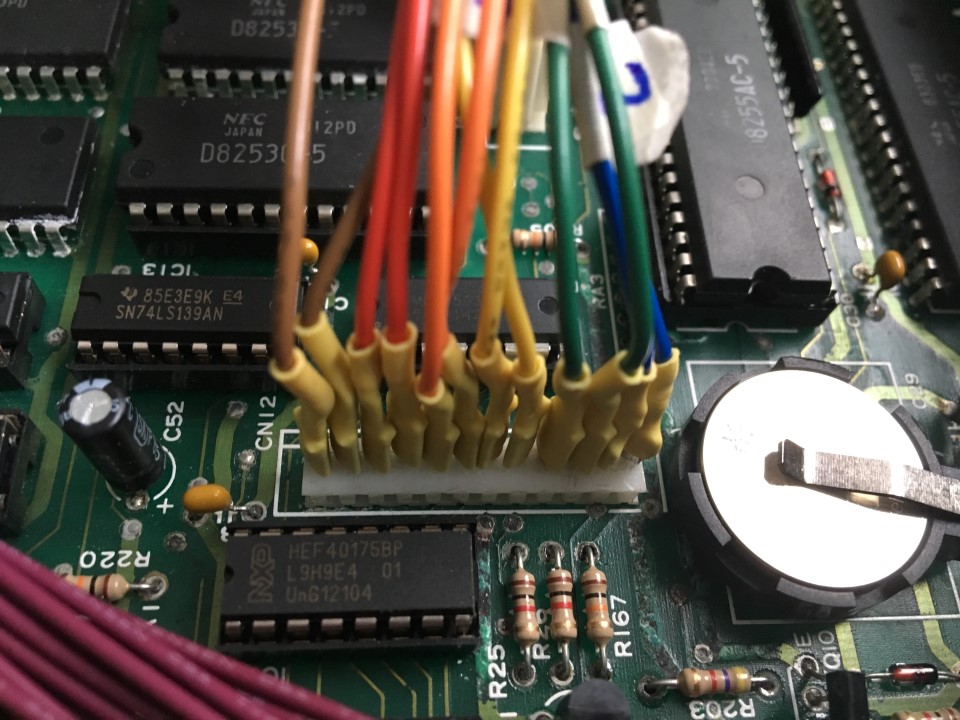
KLM-509A CN12 custom crimping
DCO2 missing
DCO2 for the six voices are provided by IC5 and IC14 on KLM-509. DCO2 was missing on voices 4-6. This meant that one of the chips was doing its job and the other one wasn´t. It turned out that a trace between IC11 and IC14 was cracked, leaving the CS line non-functional.
Number 6 switch
This was in fact an easy fix, because it was also only a cracked trace on KLM-509, but it was the hardest to find out because of the barely readable schematics. In the end I was lucky that I didn´t depend on it more.
Finalize
That was about it. One Poly-61 back to life. All that was left where the typical restauration tasks like cleaning pots and key contacts and cosmetics.